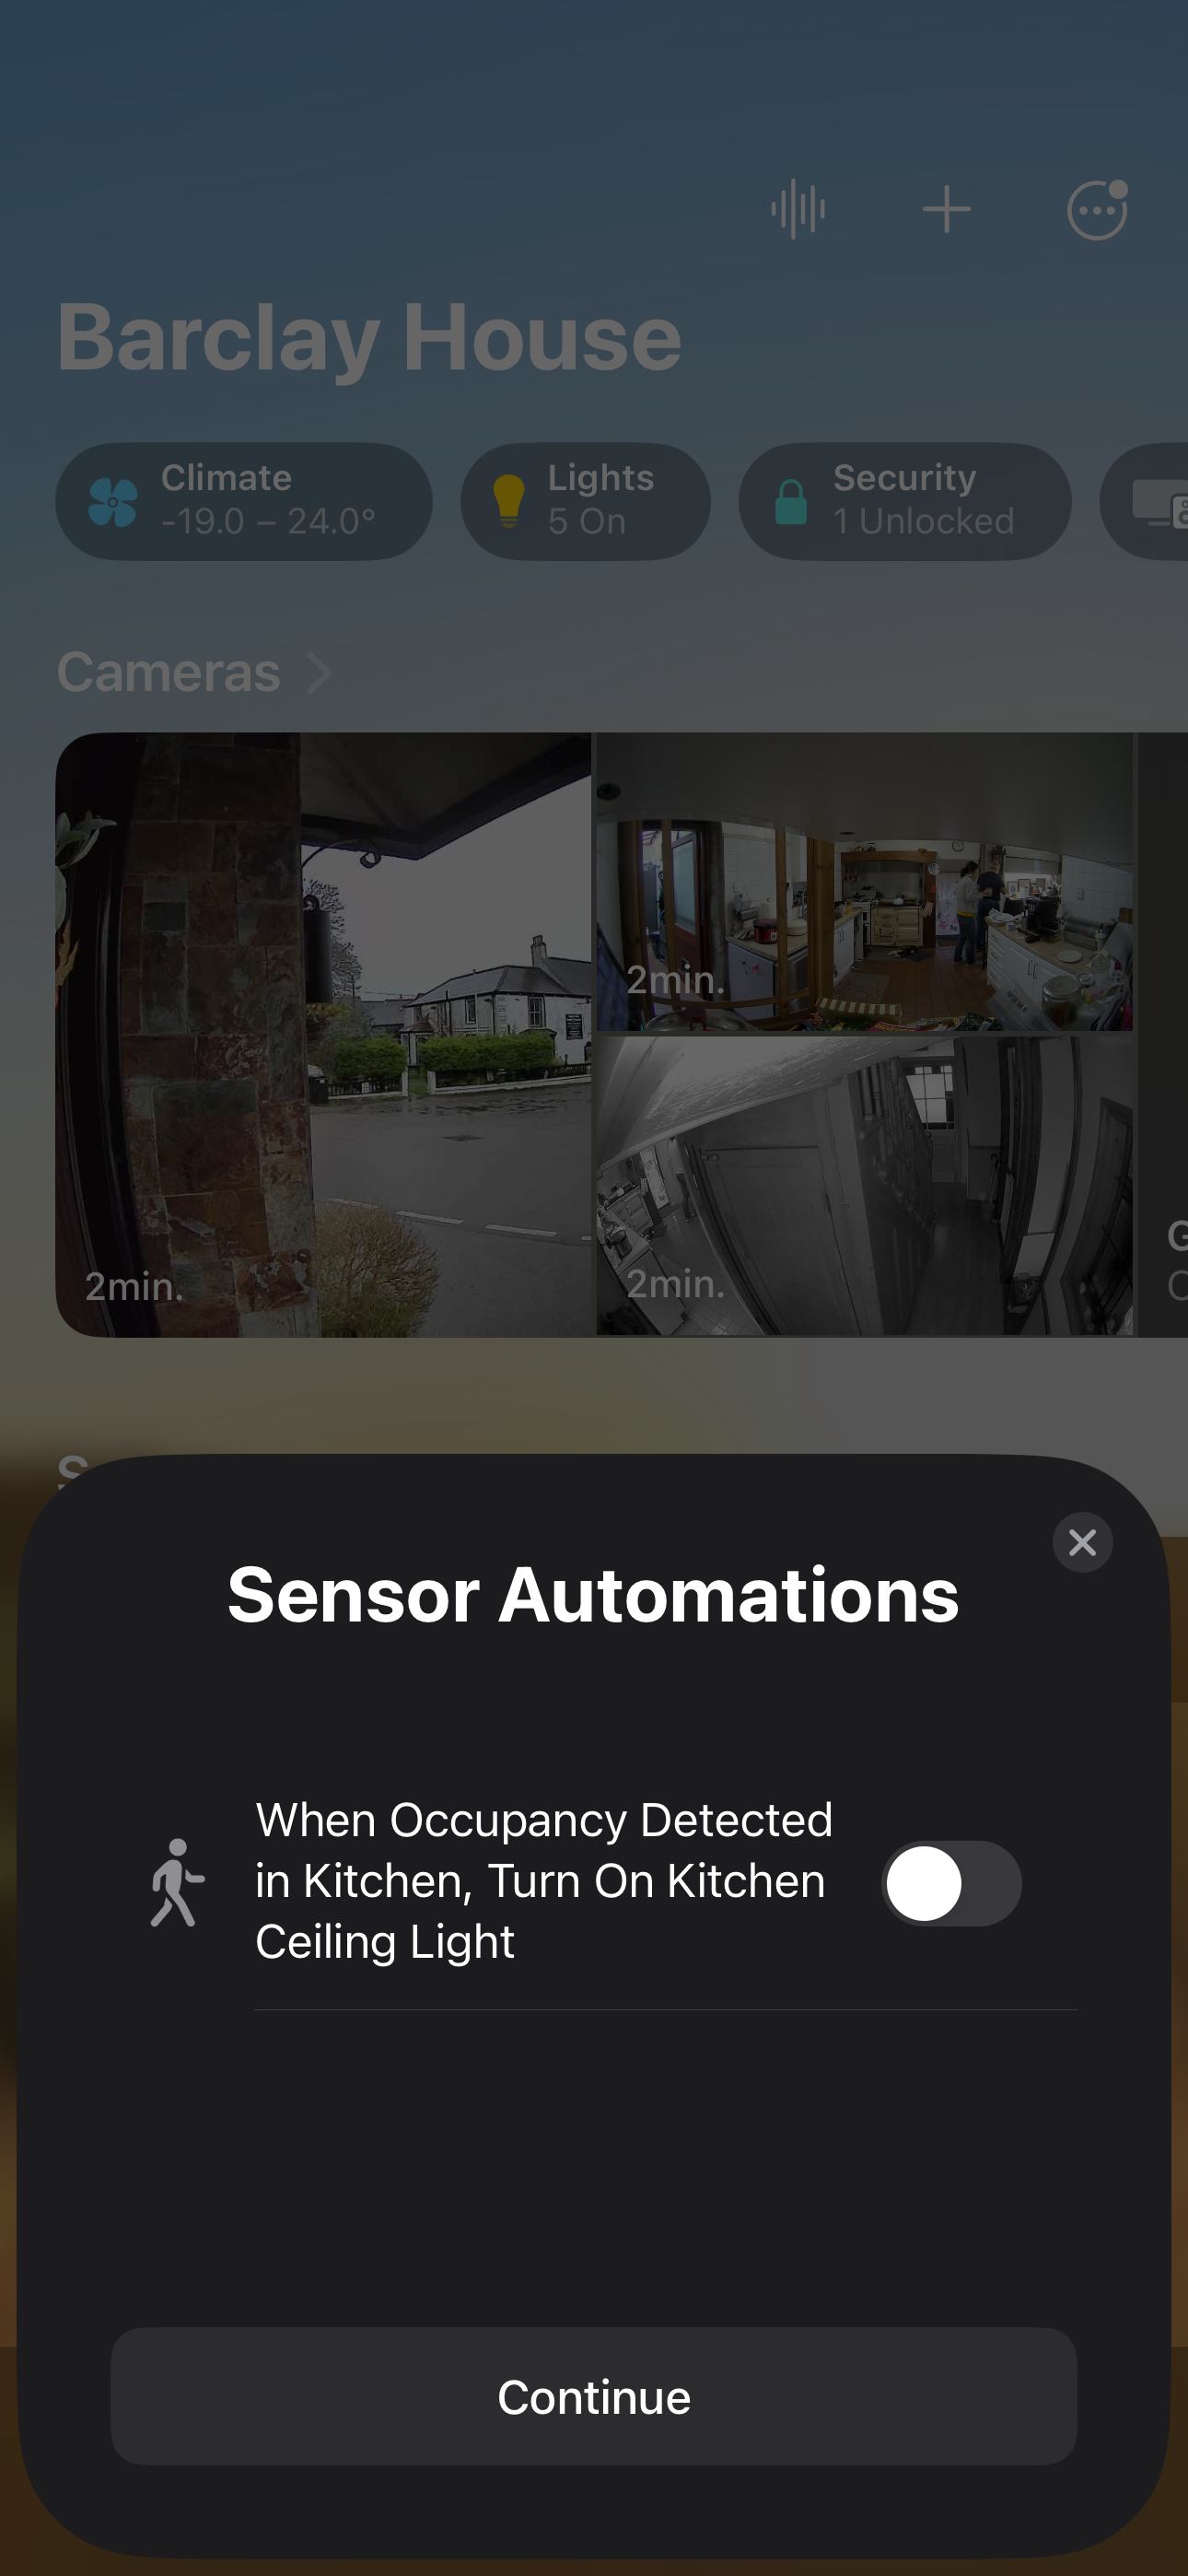
I'm a huge fan of Presence/Occupancy sensors in Apple Home, having been running a Beta of Hiome since late 2019. An
earlier blog post, from 2020, covers the Hiome system and compares it with motion detectors, and why it is a superior experience. I still really like Hiome, it fits extremely well in my 1850's remodel of a 400 year old house with its numerous small rooms, but Hiome have shut up shop now, having never actually released the product, and it does have its issues so I decided to give the FP2 a whirl.
I've been running the FP2 for a few months now, and haven't really said too much about it, except mentioning it in a few blog posts, but not giving any detail. Partly that was because, initially, the product wasn't really that good. Set up was "painful" and it kept showing "ghosts", which are memories of someone being there when they are not. I'm happy to say that these issues seem to have mostly disappeared now, and so I'm quite happy to write up my experience and I have started replacing my Hiome implementation, although I do keep waiting for sales to buy the FP2's as this is going to cost me a bit of money.
How does Aqara FP2 compare to Hiome? Well it does have one of the issues that I mentioned in the previous article, that being of coverage. Where do you place it? So the same issue as a Motion Sensor. This is particularly true if you have a lot of doors. Hiome had a sensor over each door and that works well for houses like mine, but not so well in an open plan house where you have zones rather than rooms. The Hiome couldn't tell you what zone you were in, whereas the FP2 can.... if you set it up. So, I've given the example of my kitchen/Dining Room which is the most open plan room in my house, and definitely has Zones.
Installation.
You now have 3 options, with the latest firmware update. You can put it on the wall to act as an occupancy sensor. On the ceiling as a fall detector, which I've been intending to do as my mother is getting old and frail, and lastly as a sleep detector.
This overview is as an occupancy detector which, I think, is what the majority of people will use it for.
The biggest issue here is to work out where to put it to get maximum coverage. we are looking at two use cases here.
One is over a door that leads between the old shop and the kitchen. This gives the clearest view of the entire room, at the moment, partly as I have what's left of a dividing wall sticking out into the room, so the sensor has to be facing that to see both sides. Of course, this does mean it is a little slow to spot when I walk in from the Shop to the Kitchen, which is one of the issues I have with motion sensors. Hiome was very quick at this, as the sensors were above the doors.
The second is in a corner in the Living Room. This gives excellent coverage over the whole room, but that's easy as the room is roughly square. However, the issue here is how do you mount it in the corner. Aqara provides mounting capabilities for on a wall, but not in a corner. If you have a 3D printer, you can find recipes to print your own corner mount. If you don't then I found one on eBay.
The only issue is that it expects 90 degree corners, and I live in an old house, so my corners are not necessarily that. I had to pack it out with double sided sticky tape, and that worked.
When it is physically installed, you can then set it up in Apple Home. This is a fairly typical installation at first. The QR code is on the back of the sensor, and is easily accessible.
You will note that you now have a light and occupancy sensor in the room. I actually had to change the names as I already had an Occupancy Sensor (Hiome) and a light sensor (Fibaro). I have found the light sensor to be particularly useful, especially with automating lights as you only want them to come on when it is a certain level of darkness. What is interesting is that the Aqara light sensor seems to report lower light levels than the Fibraro light sensor.
Now you need to bring the sensor into the Aqara app so you can calibrate it and update the firmware.
You open the app, and select HomeKit. You will then see a red dot next to HomeKit devices, and by selecting that it will show you devices you can bind to the Aqara App. You can see the FP2 I just installed in the kitchen.
I must admit, I was not terribly happy with this, as now Aqara potentially gets more information than I am comfortable with, but it is the only way to calibrate the FP2 and to get firmware updates. I should say that I'm in the UK and I am covered by the Data Protection Act, which is the UK version of GDPR. I have read the Aqara Privacy Policy, and it seems to me that their data collection is acceptable.
In binding the fp2, it then adds it. Annoyingly it puts it in the Default Room, even though it is in a room in Apple Home. If the Aqara app can access the HomeKit data, why doesn't it know which room it is in and just put it there. So, there is an extra manual step which is completely unnecessary.
When you go back to the main page of the app, you will now probably see that there is a red dot on Firmware update. In my case it was also true for the Aqara Doorbell I have implemented.
Once you have done the firmware update, you can now get into the first stage of calibration.
You select Accessories, and it now shows you a list of accessories that you have. Then you select the presence sensor you have just installed and then what you wish to use the FP2 for. I selected zone detection.
<Update 4th Feb 2024>
With V1.2.5_0003.0072 there is a new set of questions, which is if you want to install in the corner, something they recommended, but didn't do a great job of.
The app now goes 3 fairly detailed screens on how to physically install the FP2. You should note the area it scans which, for the kitchen dining room, fits in with my issue around not covering the entire room due to where I'm forced to place my FP2 to get around the issue of the semi-dividing wall. For a truly open plan room, following the recommendation of a corner is best, and I've done this for my living room.
Wall mode:
Corner mode:
Note it also gives you hints on height and rotation:
Calibration
Finally we get into set up. Finally! This is part of what Aqara has been perfecting over the few months the product has been on the market. It is much easier to set up now than it was at launch.
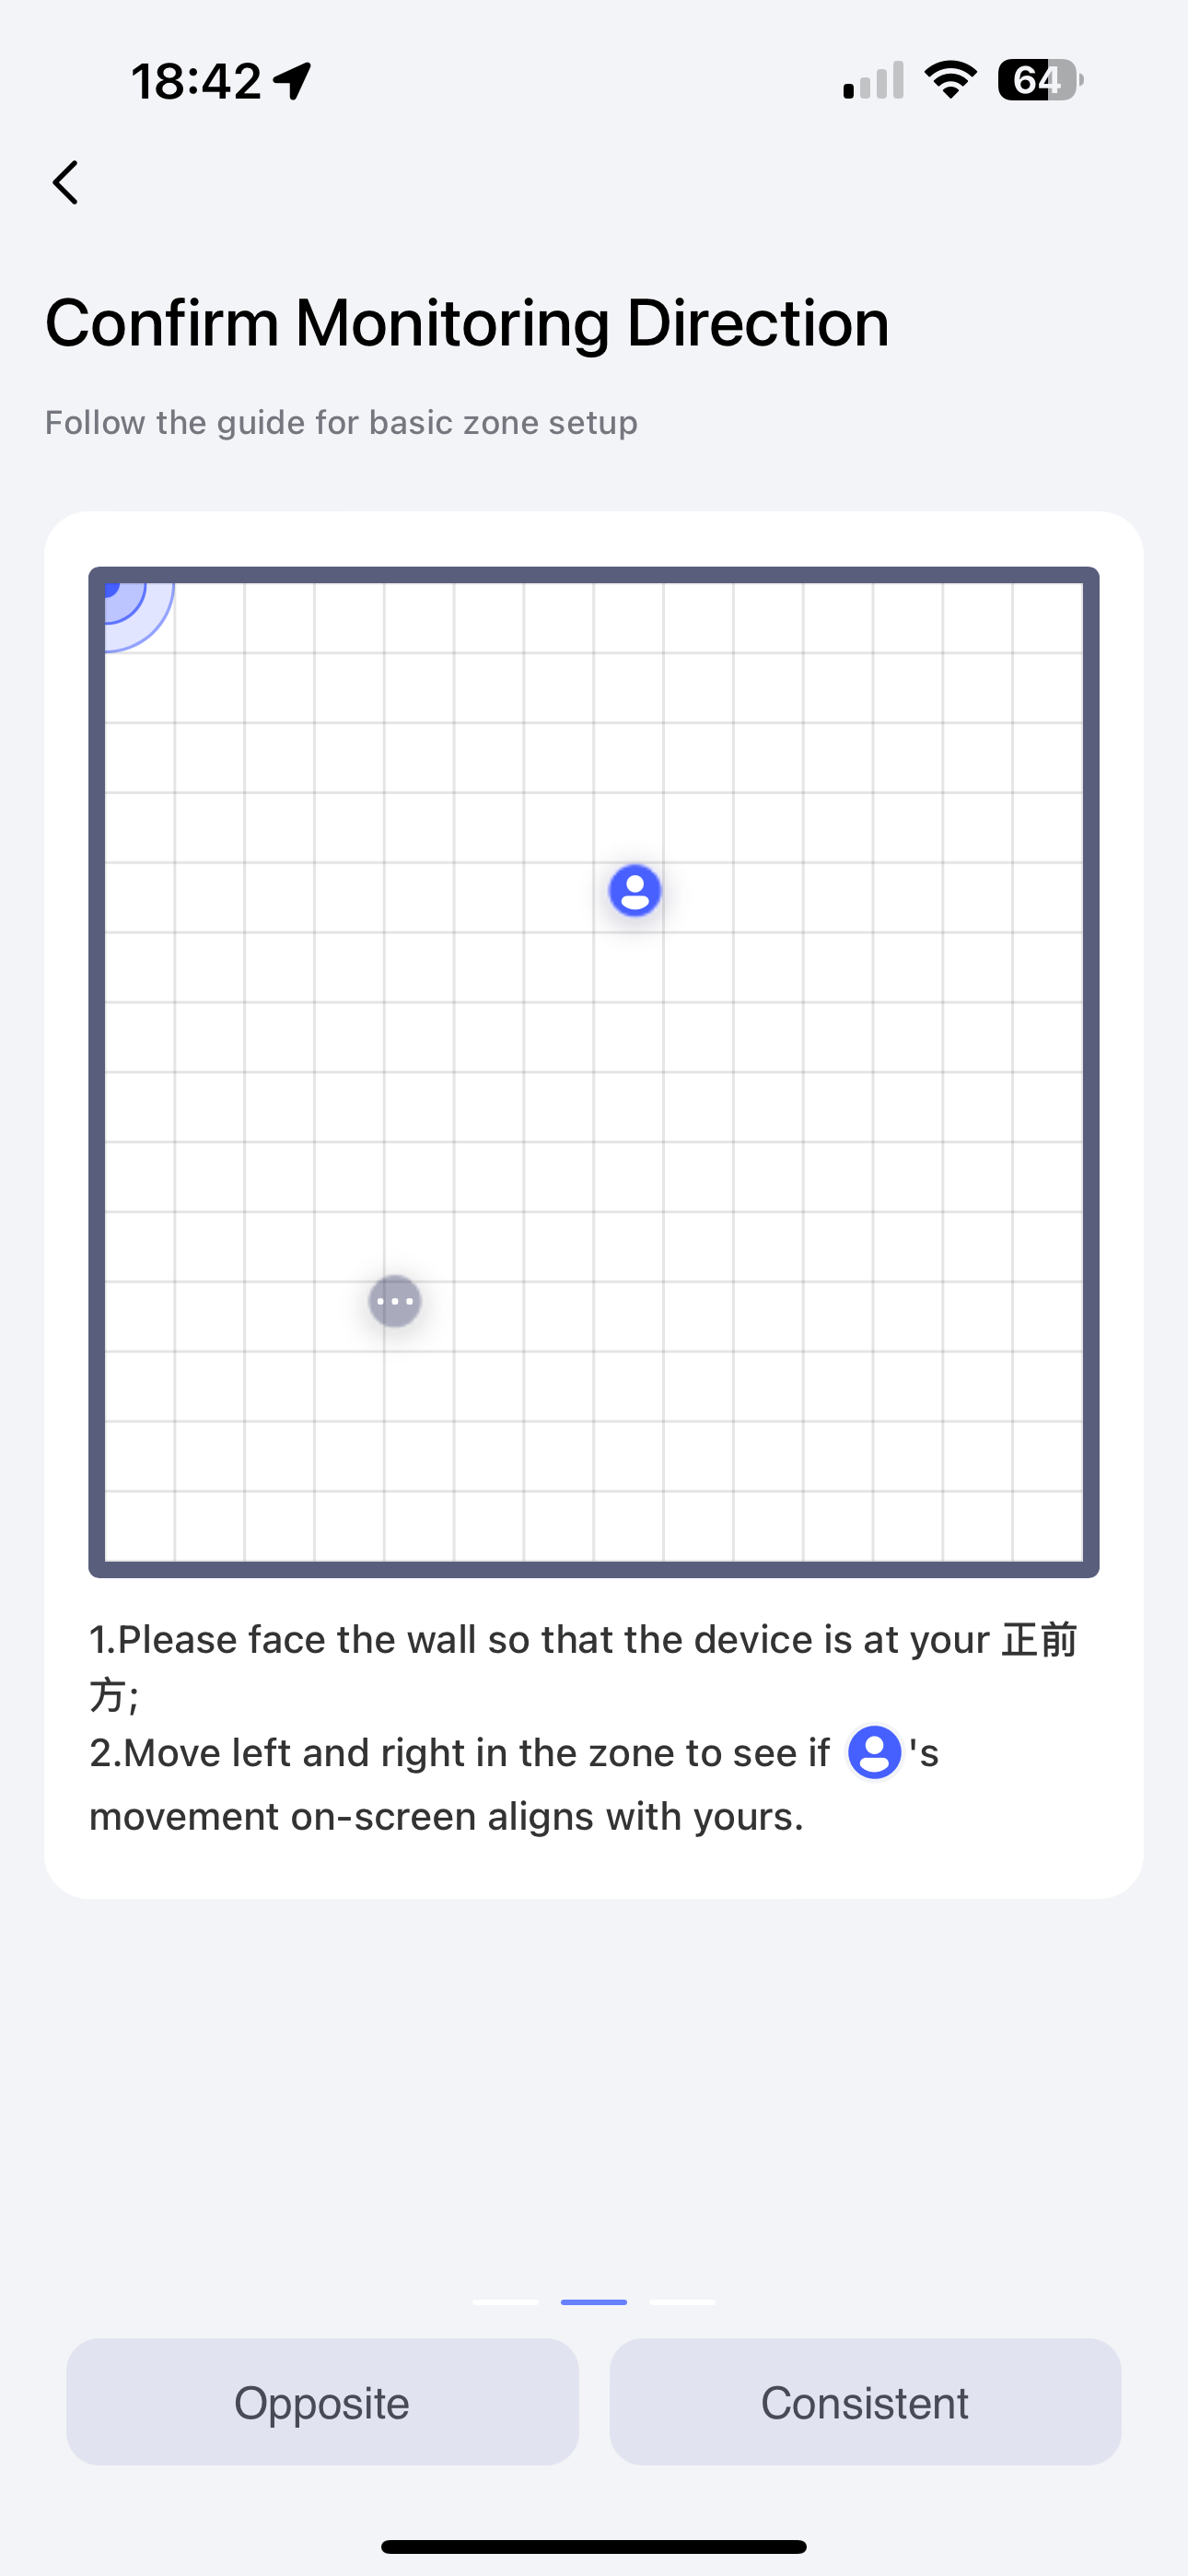
The first step is to confirm directions. This lets the FP2 know what orientation you have it set to. There is no right or wrong, but it does need to know. That little blue icon was me, and it tracked me moving around. In my case, I had to select Opposite.
<Update 4th Feb 2024>
Depending on if you use mounting on a wall, or in a corner, will depend on how how it looks.
Wall mode:
Corner mode:
Then we get into setting the extremities of the room. The example shown here is for my kitchen, where I wall mounted, but the corner calibration is very similar. The second icon you can see here was my partner coming into the room. I had to ask them to leave whilst I competed the set up, but they did remain as a "ghost" that you can see it in the final screen. Fortunately it did not screw up the calibration.
Now you need to step out of the room for the AI to make sure all is good.
At this point, you are now basically set up and scanning the room. Personally, I've found it to be a good idea to leave the FP2 for a couple of days before I go on to set up zones, which are parts of the room.
Setting up The overall room.
After having let it think about things for a couple of days, you can now think about setting up zones. This can get quite involved.
You go back to the accessories tab, select the sensor, and then you will be given the options of "Installation Mode" and "Zone Management". It should go without out saying that you now go into "Zone Management", and you will be shown the space you created during calibration, which is what is referred to here as "Installation Mode". I really suggest you re actually in the room for this. First off, you actually build what the room looks like, and this is why you're in the room. As you move about, you will see where the sensor thinks you are so you can place the items, which are stickers, on the plan.
Wall mode:
Corner mode:
Above, you can see the difference between mounting in a corner before corner mode was supported and after support from firmware v1.2.5_0003.0072.
When you add entrances, it is important that you define them as such, so that the sensor knows that that is where you can enter or exit the room. You can also define interference areas where it is difficult for the FP2 to see you, and you can see that on my diagram in the middle of the room. In my case, this is caused by the stub of the dividing wall.
Your room is pretty much set up now, and you will find you have an occupancy sensor in the room that you can use for automations. You also have a light sensor.
This means you can start some automation that uses both. I use it for turning the lights on and off.
It might seem that you want to set up an automation based on relationship to sunrise/sunset but I have found that this is not the case. You really need to do it on the light level because, especially in the UK in Winter, you do get some very dark days.
I also found that I had to continue to use the Eve App, Home+ or Home Controller to set up the automation because I wanted to say "If the <room> is occupied and the LUX level is below <level> Then turn on the lights. I also found that the Apple Home app is not granular enough with the LUX level, only working in increments of 50 Lux.
The problem with using any non Apple Home app is that they can only create scenes, and I just find that scenes clutter my screen, so I then go into the Apple Home App to actually set up what I want the condition to do.
Below, you can see the rule for when the room is occupied and the lux level is equal to, or below 30, in the Eve Home app, and then the same in the Apple Home app.
Then to turn the lights off if the room is occupied and the LUX level is above 50. This means that if the day brightens up, the lights will automatically turn off, but because there is an overlap, you don't have that boundary at exactly 30. They come on at or below 30 and will stay on until you get to 50 LUX. if it goes dark again, then they will come back on at 30 LUX. This was actually quite important for us, as our house is at the end of the bus route, and as the bus goes past, it dims the light in the room.
Finally, there is the automation for turning the lights off. We actually found that because the kitchen is very active and that we pass through it quite often and having the lights continually turn on and off immediately was quite distracting, so we have set it up so the lights only turn off after 5 minutes of the room being unoccupied.
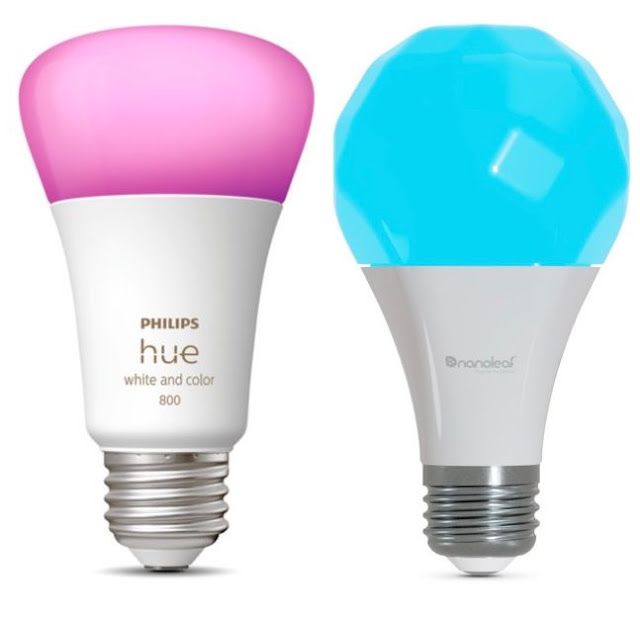
To use the "Wait" capability, I had to convert this to a shortcut. You may also be wondering why it says 4 accessories but then only shows 3. This is because my Kitchen Ceiling Light is actually a group of 2 Nanoleaf Bulbs/Globes.
Setting up Zones
OK, so this is where I have a criticism of Aqara and the use of the words they have chosen.
Roughly, Rooms in HomeKit are Rooms in Aqara. However, this is not true with zones. In HomeKit, Zones are multiple Rooms (I have one called "Kitchen Diner" which is my Kitchen and Dining Room), but in Aqara, Zones are subsets of their rooms. Indeed, when you get into an open plan room, like my kitchen diner, a HomeKit Zone is an Aqara Room and a HomeKit Room is an Aqara Zone. Damn annoying!
So, let's set up those Aqara Zones. You go back into Zone Management, and select New Zone, which you can see at the bottom of the screen.
You then define a zone by using your finger and you name it. Initially, you can see I defined the Dining Room. Then you can add another zone and I defined that one as the Kitchen.
It really is as simple as that.
In Aqara, you will now see :
All areas is the occupancy detector I have already been using.
You will see that it detected me in the Dining Room Zone. It's good that it knows that, and you can see it, because when you look in the Apple App you now have the following:
2 new Presence, not occupancy, sensors and they aren't named! (The 4th one in the bottom right hand corner is actually the Hiome sensor, so ignore it).
Fortunately, I have only 2 Aqara zones and I was in the Dining Room so I know that the triggered presence sensor is actually the Dining Room one and so the other must be the Kitchen.
Now what is particularly annoying is that the occupancy sensor and the 2 presence sensors are in the Kitchen. You would think that you could move the Dining Room Kitchen sensor to the Dining Room, but you can't! If you move it, it moves all of the sensors to that room. This means that any automation I do using that sensor, I have to remember it's in the kitchen.
In Summary
Overall, I like the FP2 sensor. For my house, the Hiome sensor was excellent, but it doesn't work well for open plan rooms. However, I find that the FP2 sensor takes a great deal more of setup and it isn't as quick as the Hiome for when you walk out of a room (about a 10 second delay).
In the early days of the FP2 it was extremely difficult to set up, and I can imagine Aqara had a large number of support calls, but they have really concentrated on that set up process. They've also seriously improved the detection so that "Ghosts", which are people no longer there, do not hang around. It is because of these reasons it has taken me a long time to write this post. I didn't feel like the product was really ready for general use.
Now the only things that annoy me about the product are:
- the mixing of the terms between rooms and zones.
- the inability to move a presence sensor from one room to another in HomeKit.
The area of ghosts is where Aqara took take a leaf out of Hiome's book, as Hiome would let you set the number of people in a room so if you did have a ghost, you could quickly remove it.
I am now starting to replace Hiome with the Aqara FP2. I do recommend it now, although I am sad at the passing of Hiome.


Comments
Post a Comment