How's a girl going to get a nice bean to cup coffee in the morning? Automate it!

I grew up in the UK, where coffee was just terrible. It was the 2nd worst coffee in the western world! (If there are any American's reading this, please do not ask me whose is the worst). Then I went to Australia, and discovered fantastic coffee, as the Aussies have been heavily influenced by the Italians, Lebanese and Greeks. I was in coffee heaven. This has meant, on my return to the UK, that I must now have at least one good cup of coffee a day... and this means I must have my own Espresso machine.
This was going to require a very special Espresso machine though. I wanted an automated one..... until I started looking at how much that was going to cost me. They are eye-waveringly expensive. So, I scaled my ambitions back a bit.
I needed a nice coffee machine that could:
- work with button presses.
- be able to produce 2 double espresso's at the same time
- have a flat surface near the buttons, and
- must have reasonable coffee bean and water reservoirs.

OK, it's not cheap..... but it isn't eye-wateringly expensive either!
So, great! Now I've removed some of the "work" from making a cup of coffee. But I want it waiting for me when I walk down in the morning.
Now enter the SwitchBot Bot . A Nifty little device that has a little finger that pops out and can press buttons for you. When I bought mine they were only available in White, but now you can get them in black.... I subsequently bought some black ones, and have re-used the white ones elsewhere!
I initially needed 2 of these. One to Press the On button, and another to press the Double Espresso button. And that's the reason for the flat area... so be able to stick the Bots onto the fascia.

Now you can see why I wished I had black!
The top one does the on/off
The lower one hits the double espresso button.
I later realised I needed 3, which is one to push the "Steam" button, which is the top right hand side.
Brilliant! Except these little beauties only talk Bluetooth to my phone, which is as much use as chocolate coffee pot!
I need the SwitchBot mini hub .
This does many things, but one thing it does is provide a WiFi hub for the Bluetooth mesh created by the various SwitchBot devices, of which I have more. I'm actually amazed how far the signal goes, as I have the hub in a completely different room.
Adding the bots was quite easy. I just had to bring them near to the hub, and they self register. All I had to do then was name them and, optionally, put them in a Room.
I could now remotely control the buttons. It's all getting better.
Of course, if you are reading this you know that this blog is all about HomeKit, and that is an absolute requirement for me. No HomeKit support, I'm just not buying it. Unfortunately, SwitchBot did not have HomeKit support. Well, not directly. They built a Homebridge Plugin. Yippee! Superb!
Switchbot now has Matter support via the Hub 2 and now Hub 3. The Matter support worked well for curtains, but initially not so well for the bots as they advertised them as light switches and so I continued to us the Homebridge plugin.
However, as of early April 2024, Switchbot have released V2.x of the Hub 2 firmware and this has now changed bots to be plugs. Again, not exactly what I wanted, but better than lights. Why can't they just show them as switches?
V2 of the firmware also effectively increases the number of devices supported to 8, which now enables me to cover all of my external to the hub devices... but now means I can't show the temperature and humidity sensors as I break the 8 limit. Not a major issue for me, as the hub sits in my understairs cupboard. The Hub 3 increases the device support again.
These two features have enabled me to finally retire the Switchbot plugin for Homebridge, all be it with some workarounds.
Configuration
Hardware Configuration
Adding the Bots
Initially this is very easy. You remove the battery tab from the bot, so it powers up, then you open the SwitchBot app, and here you can see the two bots I have already added. Then you press the "+" in the top right hand corner, and you see the Switchbot devices yet to be configured, and you press the icon for the bot.


You will probably have to also upgrade the Firmware, you do this by going into "Firmware & Battery", and then select "Firmware Version". It will then go through a few screens where it warns you not to disconnect, and then you'll get quite a rapid upgrade. In this example, I went from V4.9 to V6.2.


Now you can attach your Bot. On the bottom is a 3M sticker. Peel of the protective covers and press onto the device, fairly close to where you want the bot's finger to press down. In this case, it's right beside the button on the coffee machine.


Integration of bot with Apple Home via Matter.
When your hub is setup, go into "settings" for the Switchbot Hub, and you can see "Matter Setup (Beta)."
You literally press the plus button next to the devices you want in Matter, and the minus button for those you do not. Below you can see the bots, curtain motors and a light strip I have added.


The bot will appear where the bridge is located and will be called "Matter 1,x", where x is a number. When you add a number of accessories that are the same, it does rather make it hard to work out which is which, so I do them one at a time. I then moved the accessories to a special room I created called "Kitchen Appliances" in HomeKit and removed them from Favourites as these are really used for automation only.

I can now tell Siri to "Turn on <bot name>"
To be fair, I could also do that by Siri Shortcuts, from the native app, as it is one of the options under "Cloud Services". However, now it is in Apple Home, I can use those switches in Automations.
Adding to Personal Automation for my morning routine.
I added making a coffee in the morning to my morning routine, described in a previous post.
If I expand the section where it works out if I'm at home or not, it then Turned on the Coffee Machine, waited for 50 secs, and then turns on Double Espresso. For me, that's enough time to get down stairs. If I then wanted a Flat White or a Latte, I'd tell Siri to turn on the Steam whilst I walk to the fridge to get the milk. By the time I'm back at the coffee machine, the Steam is ready to use.
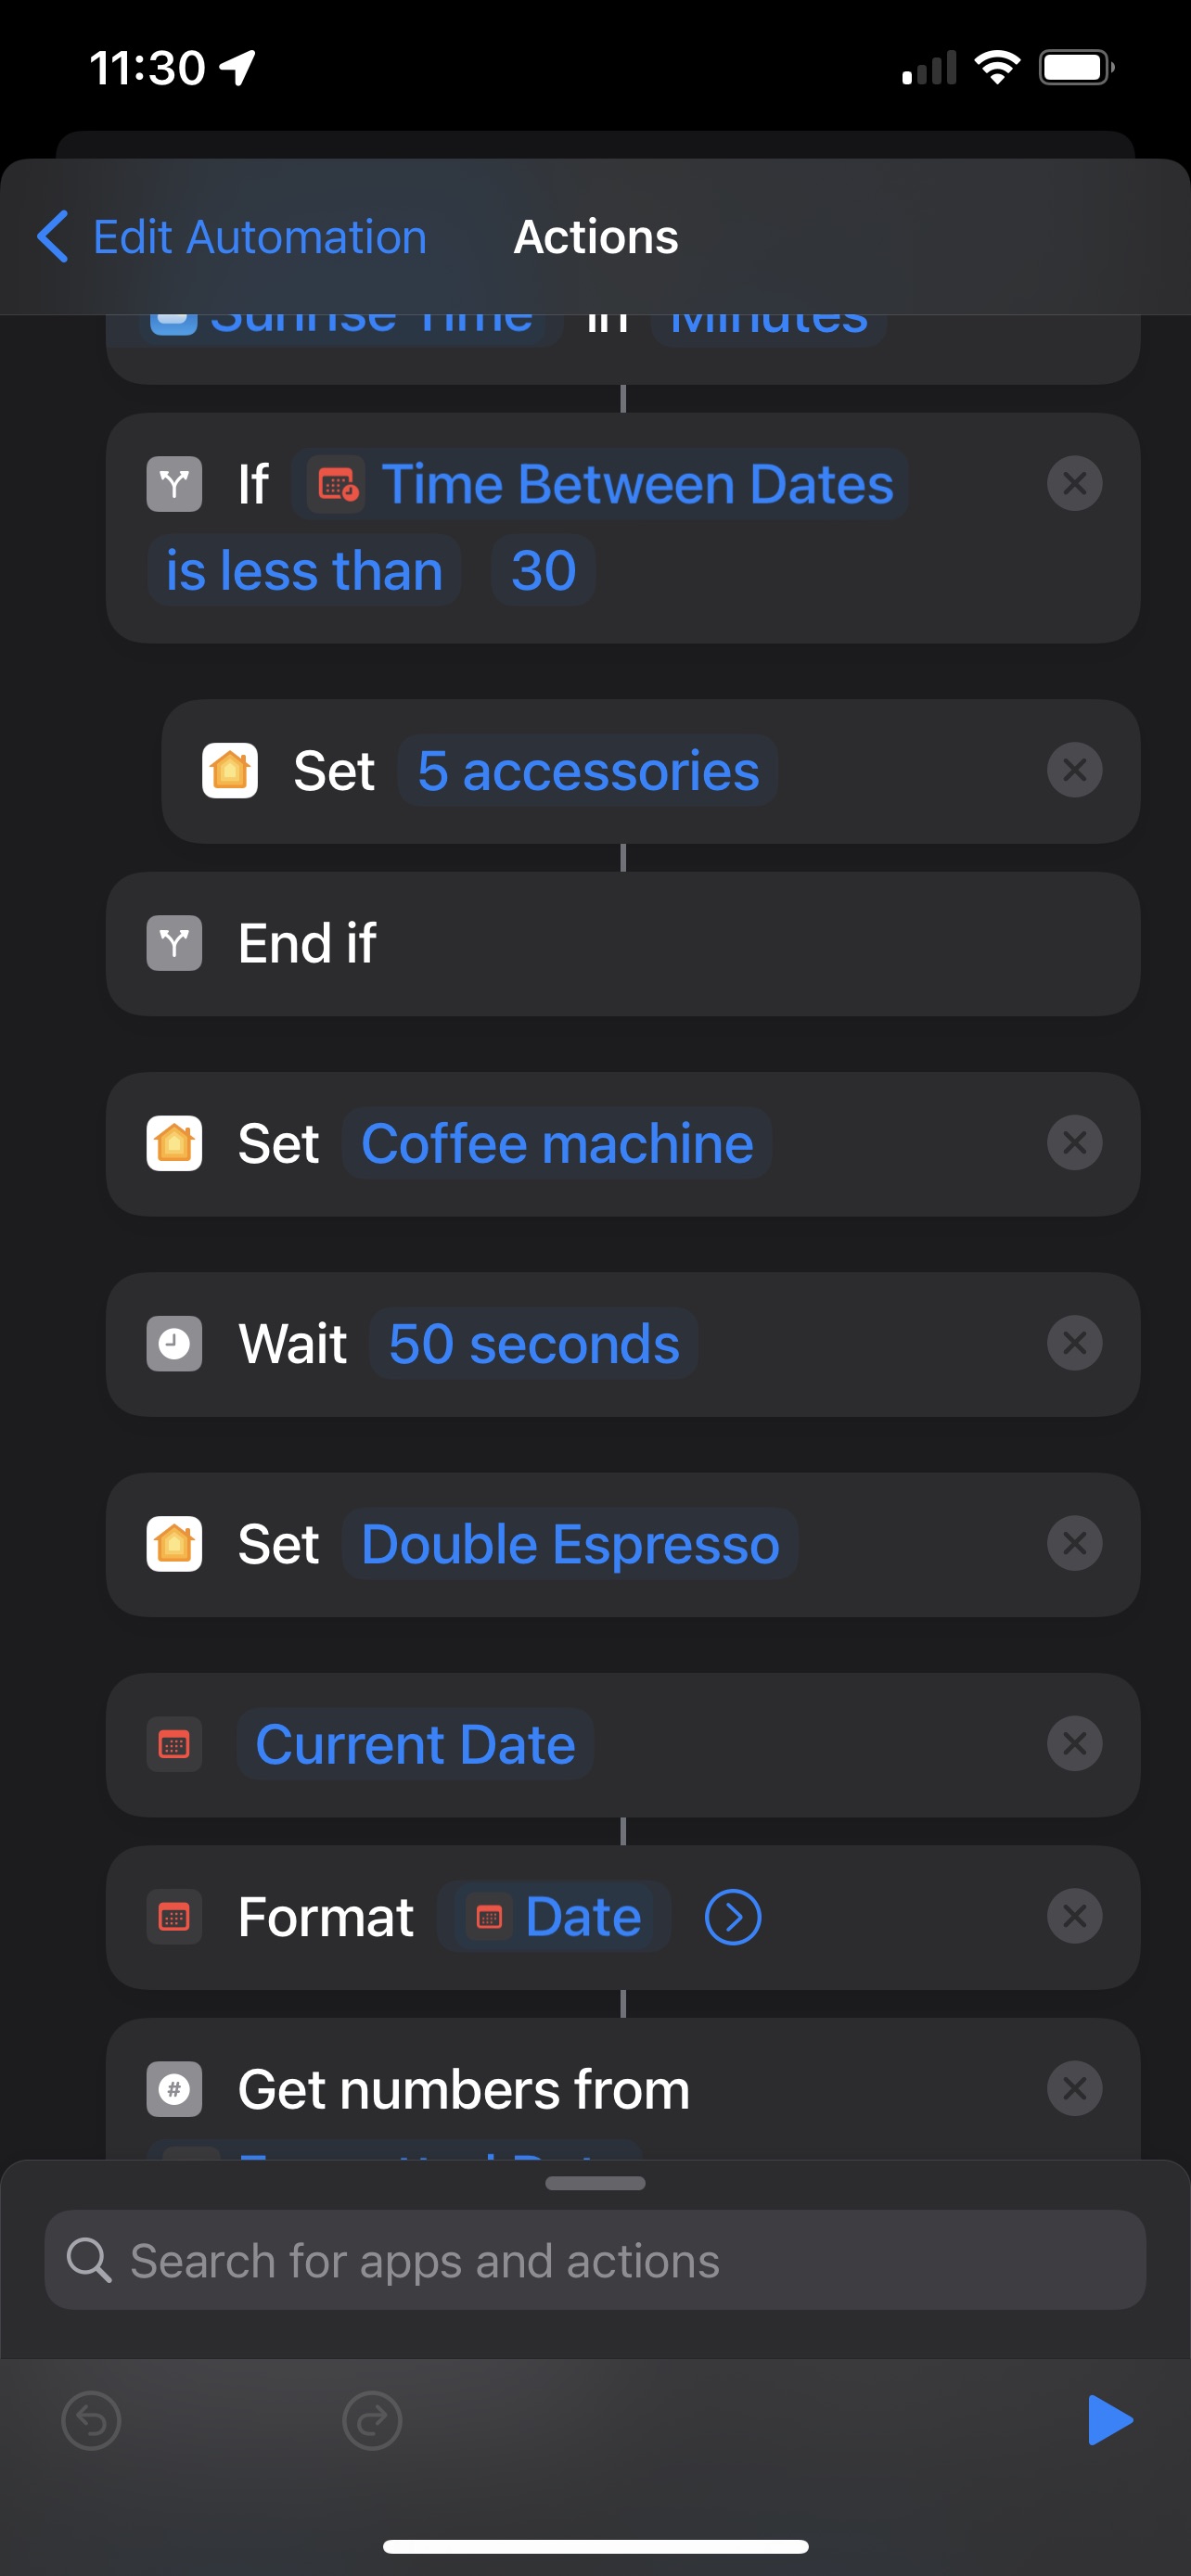
However, what I failed to appreciate is that the coffee machine cleans itself every time it turns on, or off, and so I could not have it pouring the Double Espresso as that would now contain water from the cleaning and the coffee.
I needed someway to get the coffee cup under the dispenser after the machine had cleaned itself. This, obviously meant some kind of robotic movement. Not only that, but it had to be adjustable. Am I doing one Double Espresso, or two of them?
Let's get some movement going.
I needed a robot to only go in one direction. As the spout for the milk is on the left hand side, it was from right to left and back again. I did not need back and forth. There is a robot in Apple Home that does this, and it is a curtain motor. I decided to use the Switchbot Curtain. Somehow, I'd attach a tray to it, and then this tray needs to glide along and be able to deliver either 1 or 2 coffees.
Hmm, not so simple.
The Robot

The Tray

Making the items movable.


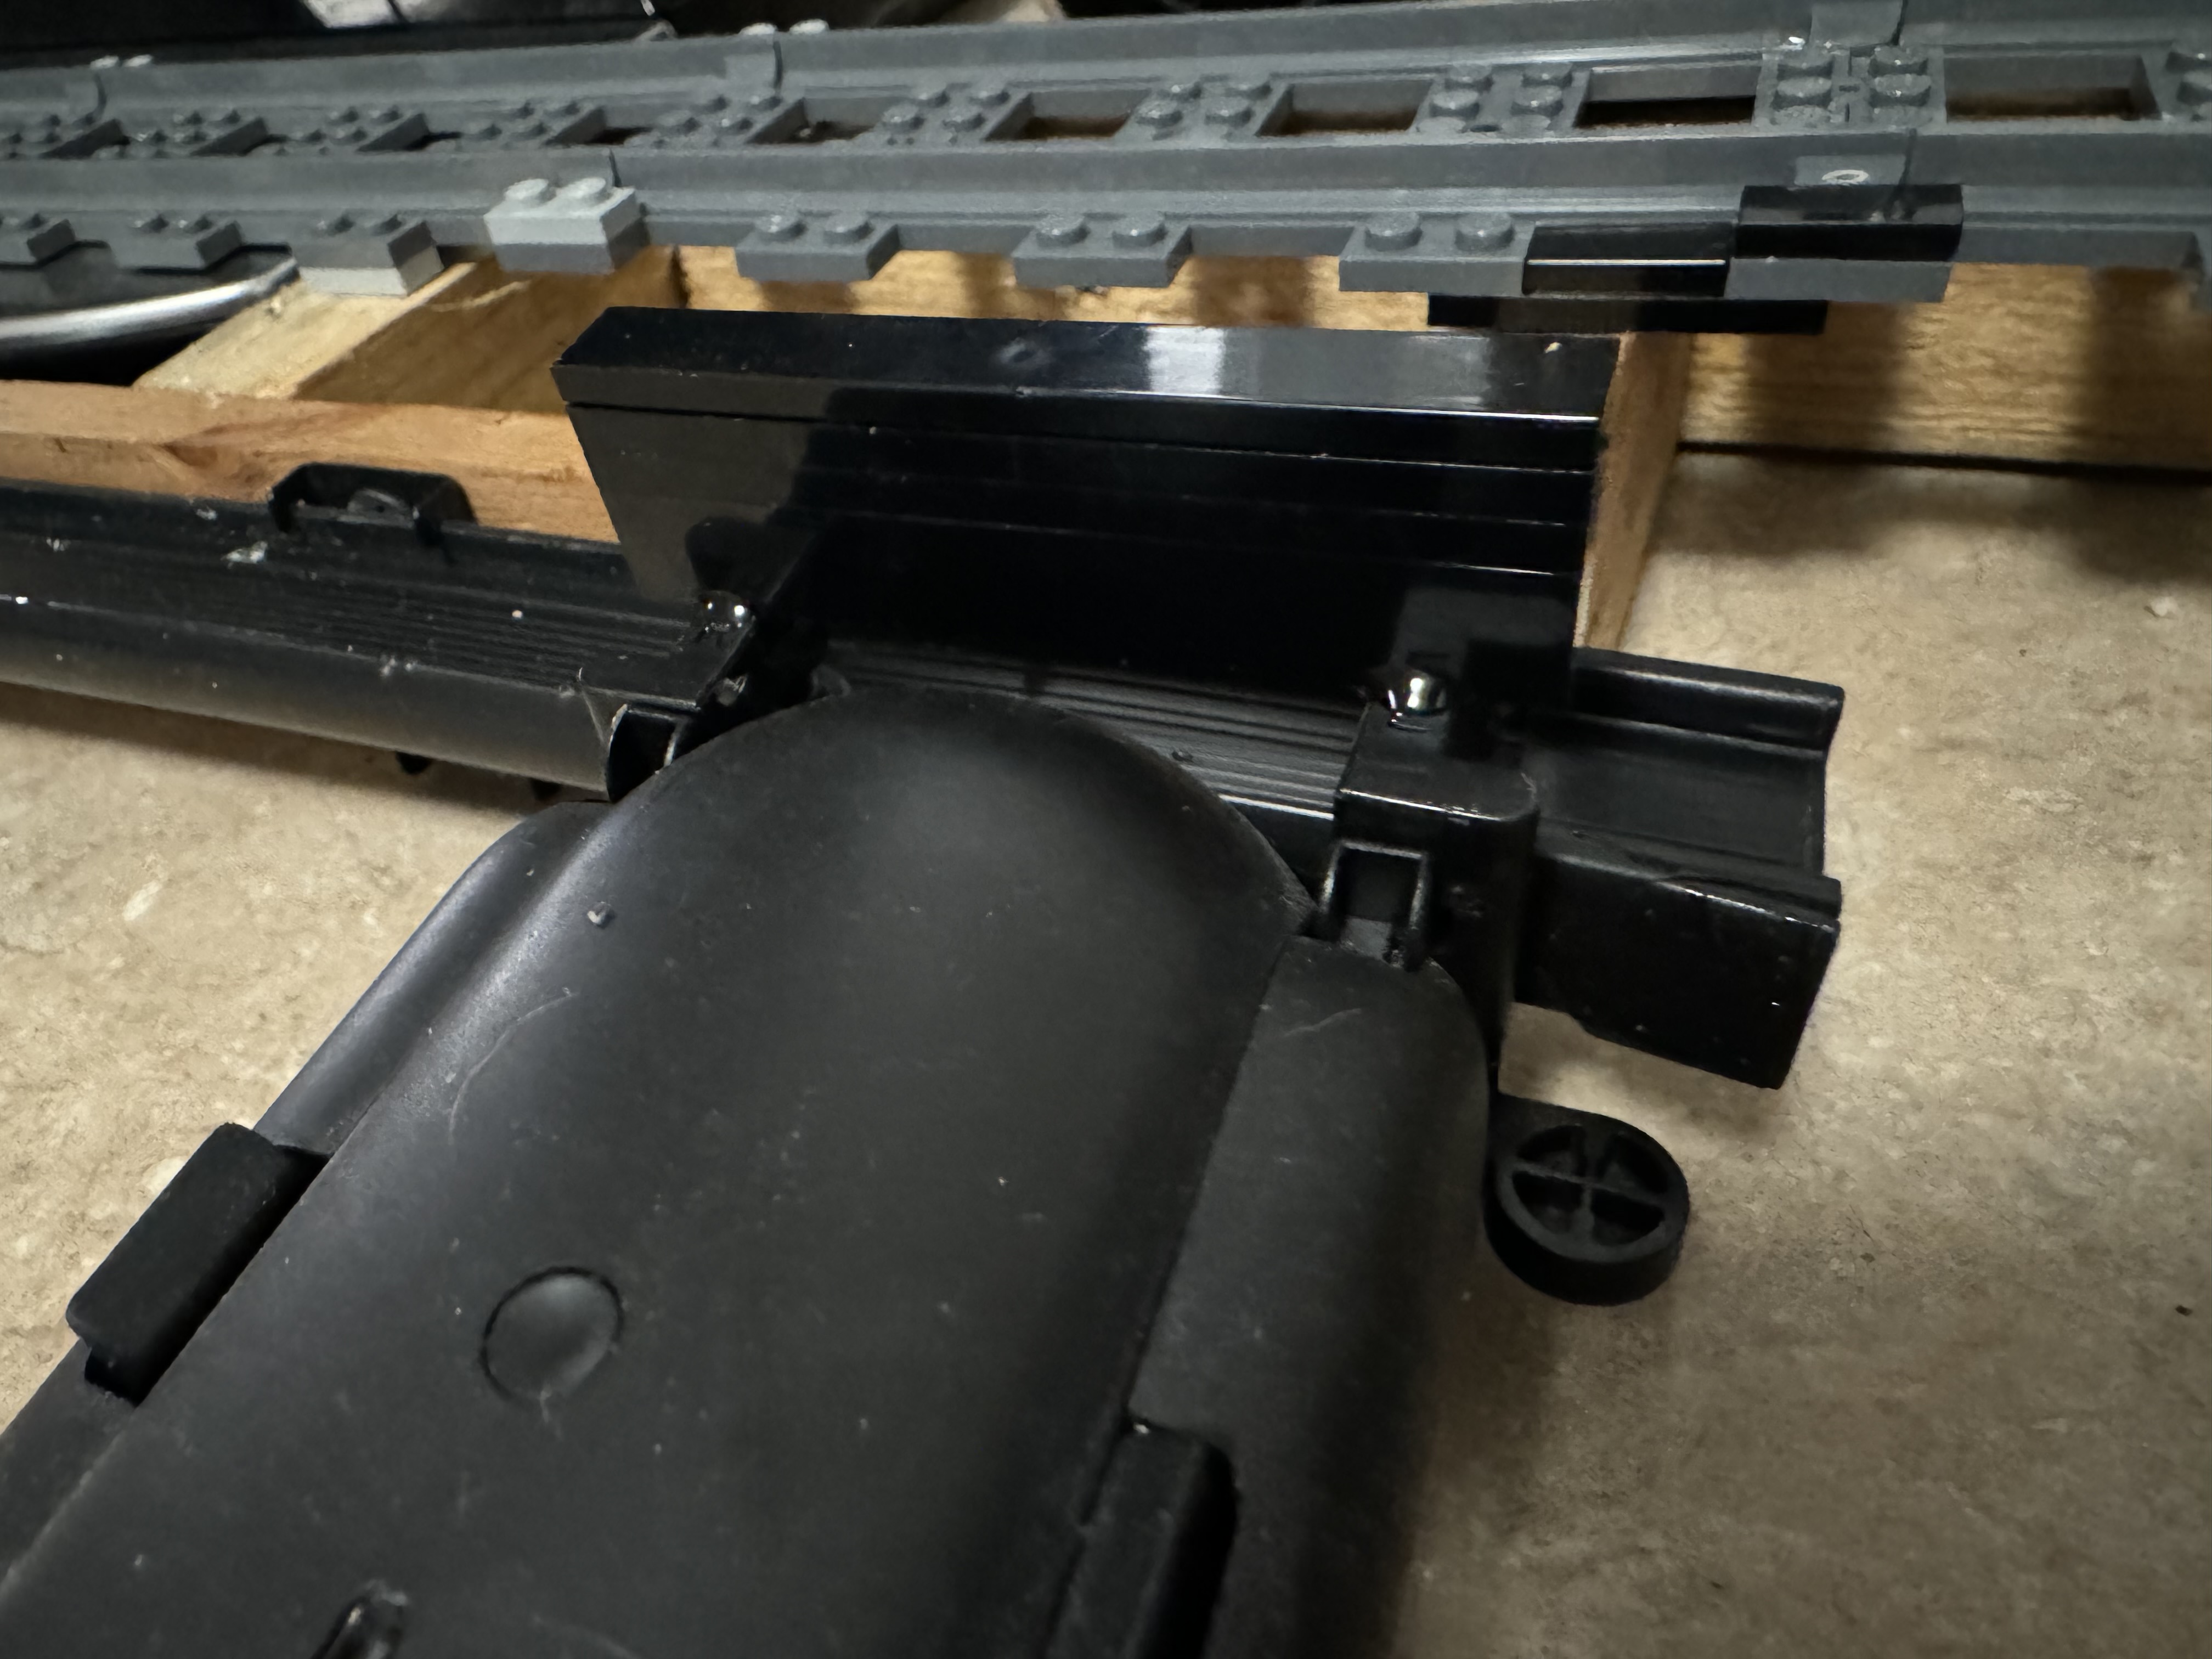
The Wheel Rails

Attaching the Tray to the Robot.

Test Run.
Re-Think
Lego Wheels on the bottom of the Tray.

Building the connector between the Robot and the Tray
Calibrating the Robot.
It Works! Test Run.
Automation

Final Build (?)

- I'm tempted to replace all the wood with Lego bricks. Not necessary, but will look better.
- I'm going to put another set of Lego wheels under the robot, just so it glides that little bit better.
- When we remodel the kitchen, I'll put the Coffee Machine near the sink, and add a tube to the drip tray so that it automatically drains.
- I'm trying to think of someway to automatically notify me of when the water reservoir is low, and I think I can do it using an Aqara water sensor (See below). Then, how to get more water in?
Final Final Build!
- replaced the wood with a combination of Lego and Brixx, a Lego compatible brick system that is about 1/3rd of the price.
- changed the tray for an uxcell Serving Tray Small Black Mini Tray 6" x 9", as it is flatter and enabled me to get slightly closer to the coffee machine.
- Added ability to do two cups.
- Added markers so I can see where to place the cups.
- extended the railway


- Set Coffee Machine (turns on the coffee machine bot)
- Waits 60 secs for coffee machine to clean itself
- Set Coffee Tray (Moves it so first cup is under the spout which is 27% Open)
- Waits 10 seconds to allow the tray to move
- Set Double Espresso (turn on the Double Espresso bot)
- Waits 50 seconds for coffee to be ground and then poured.
- Set Coffee tray to be Closed (All the way to the right - with the 2 coffee version it turns Double Espresso, moves a bit more to the left and turns on Double espresso again for the 2nd cup)
- Set Steam (Turn on Steam Bot)
- Wait 6 seconds (The amount of time it takes for the bot to do what it is told)
- Set 3 accessories (Which is Turn off the bots for Coffee Machine, Double Espresso and Steam - remembering that turning them off in HomeKit doe snot actually cause the coffee machines buttons to be pressed again)
Final Final Final Build!
Adding Water Level Detection
 |
| Water Level Sensors on the water reservoir. |
 |
| WS2 in Home Assistant |


Comments
Post a Comment